On newer Windows 8 PCs using the UEFI or EFI boot standard, many PC manufacturers require you to take certain steps to allow you to boot into recovery tools and non-EFI or non-UEFI operating systems. This guide covers some of the common ways to enable you to boot into legacy mode on your PC or laptop, letting you boot into recovery media and setup CDs for other operating systems like Linux or older versions of Windows. These instructions as well as the instructions covering disabling Secure Boot are essential to booting into 3rd party CDs and DVDs.
Contents:-
- 1 Legacy Boot Mode
- 2 Enabling Legacy Boot Mode
- 2.0.1 Entering the UEFI setup
- 2.0.2 Turning on Legacy Boot Support
- 2.0.3 Saving Settings and Exiting
Legacy Boot Mode
With newer Windows 8 PCs that are designed with UEFI support, the BIOS or firmware often has an option that specifies if the computer can boot into regular operating systems and recovery tools, or if it can boot exclusively into newer UEFI operating systems and environments. The regular way of booting into software and operating systems (such as Windows XP or Vista, Linux, and recovery tools like Easy Recovery Essentials for Windows) is called “Legacy Boot” and must sometimes be explicitly enabled/allowed in the BIOS settings.
Enabling Legacy Boot Mode
On PCs and laptops from most manufacturers, including Dell, HP, Asus, Acer, Toshiba, Lenovo, and more, Legacy Boot can be turned on or allowed from the EFI setup/configuration feature, available immediately after turning on your PC. On many computers, it isn’t necessary to enable Legacy Boot, but if you’re having trouble booting from a bootable CD/DVD or USB, then you’ll probably need to follow the instructions below to enable your PC or laptop to boot in Legacy Mode.
Below are instructions for turning on Legacy Boot support on most PCs and laptops, as well as specific instructions for certain brands of laptops. On most EFI computers, you’ll need to access EFI setup immediately after turning on your PC in order to see the option of turning on Legacy Boot, usually as an option under the boot options section of the BIOS configuration.
Entering the UEFI setup

Notice the key guide in the top-right corner.
Immediately after powering up your PC, as soon as the manufacturer logo (e.g. Dell, Lenovo, HP, Toshiba, Samsung, ASUS, Acer, Gateway, etc.) shows up on your BIOS splash screen, you will have the option of pressing a special key. This key changes from PC to PC, it all depends on your PC’s make and model.
Typically, you will see a brief note at the bottom or top of the screen indicating what the key is. One such screen is visible to the right, note the legend in the top-right corner indicating F2 will start the BIOS setup and F12 will present the boot selection menu.
Some common options include the F2, F8, F12, and Del keys. However, it could be any of the one hundred other keys on your keyboard.
Turning on Legacy Boot Support
Once inside the UEFI setup and configuration section, you’ll be presented with a number of options and parameters that can be configured for the firmware environment. The option you’re looking for has many names, depending on the make and model of the PC or laptop and the EFI firmware. Some of the possible setting names you’re looking for will include, the bold values are what should be selected.
- Legacy Support (On/Off or Enabled/Disabled)
- Boot Device Control
- Legacy CSM (On/Off or Enabled/Disabled)
- Launch CSM (On/Off or Enabled/Disabled)
- CSM (On/Off or Enabled/Disabled)
- UEFI/Legacy Boot (Both/Legacy Only/UEFI Only)
- Boot Mode (Legacy Support)
- Boot Option Filter (UEFI and Legacy/UEFI First/Legacy First/Legacy Only/UEFI Only)
- UEFI/Legacy Boot Priority (UEFI First/Legacy First/Legacy Only/UEFI Only)
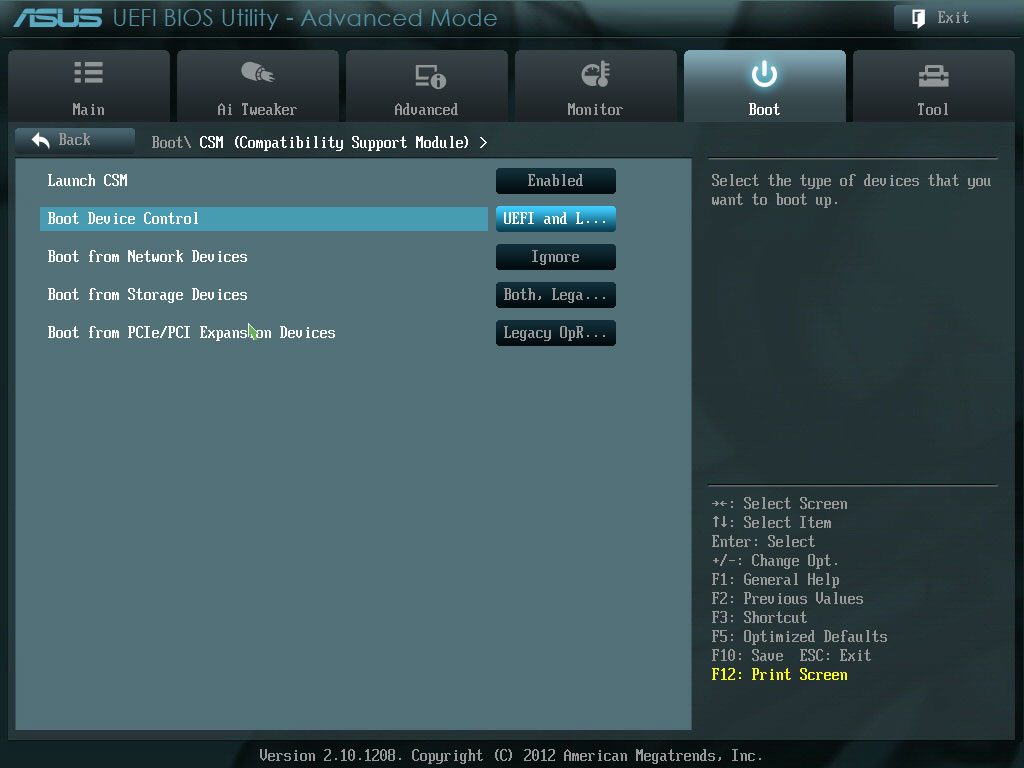
Boot Device Control
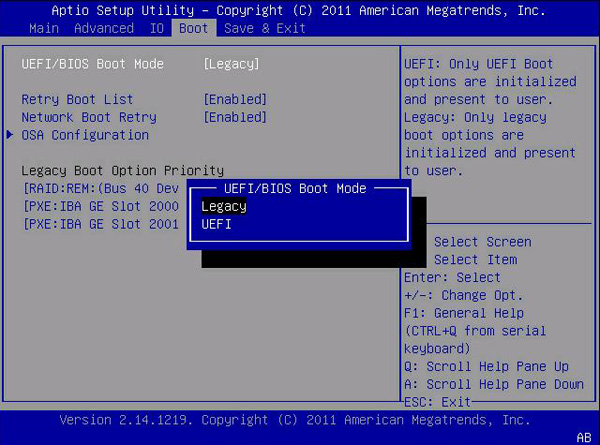
UEFI/BIOS Boot Mode
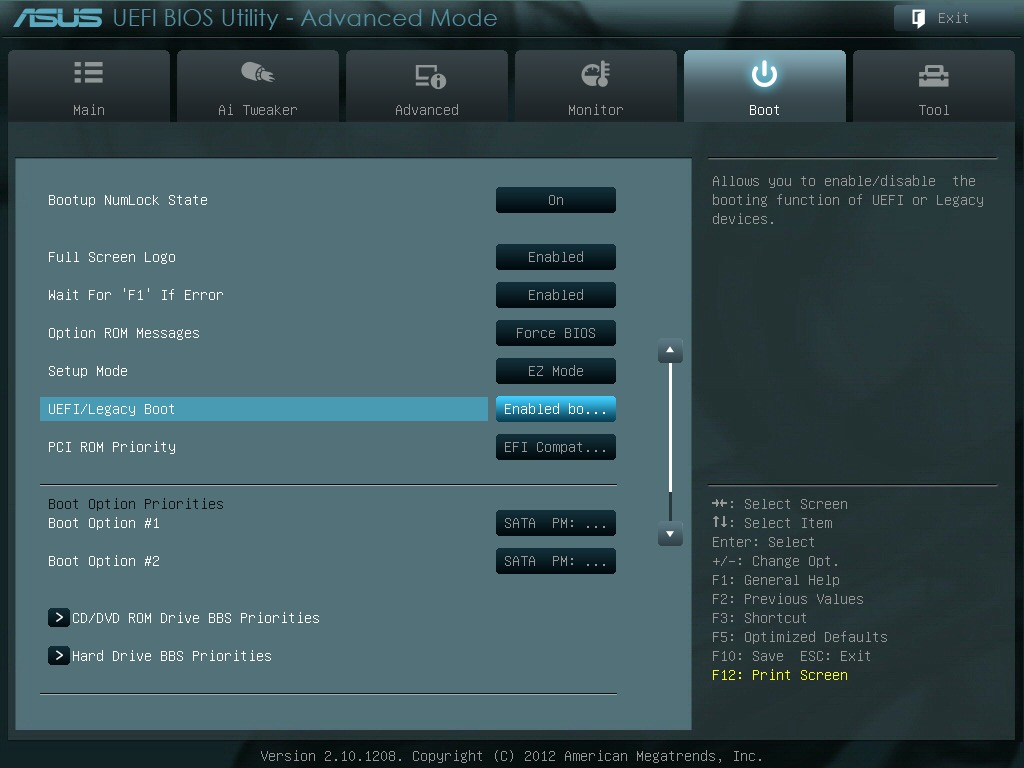
UEFI/Legacy Boot
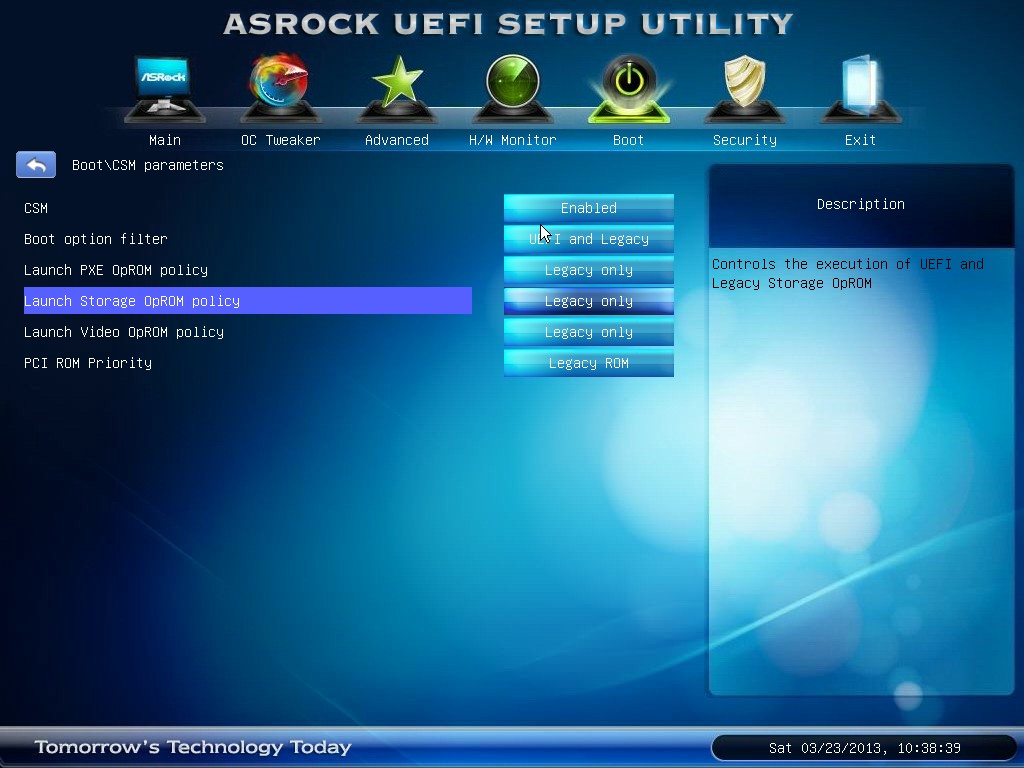
Boot Option Filter
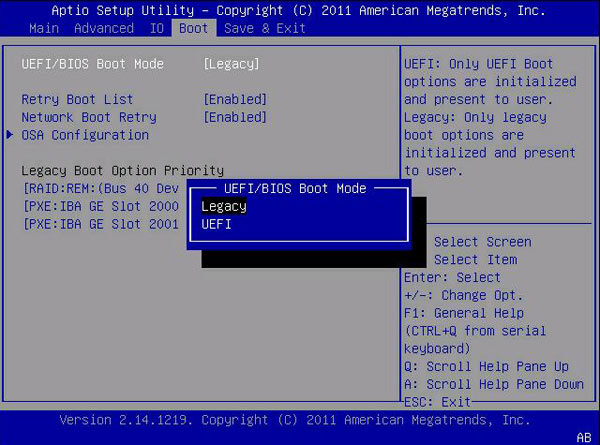
UEFI/BIOS Boot Mode
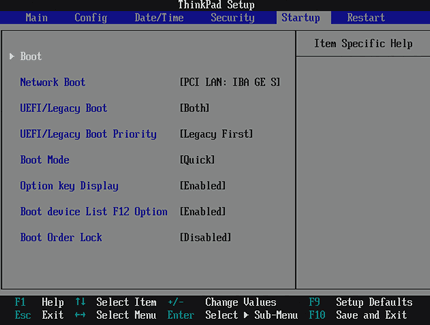
UEFI/Legacy Boot Priority
Saving Settings and Exiting
In order for the changes to the Secure Boot configuration to take effect, the BIOS/EFI/UEFI configuration options must be saved. The common keyboard shortcut to save and exit is F10.
After correctly giving priority to the CD/DVD over the local hard disk, you will need to save changes and exit. Again, the exact steps depend on your PCs make and model, but generally navigating with the ← and → arrow keys will let you reach the options of “discard changes and exit” vs “save changes and exit,” amongst others. It’s important that you choose the “save changes and exit” option! The keyboard shortcut F10 is often synonymous with “save and exit” but you should make sure before using it.